
Lemnis Gate features a total of 7 Operatives to help swing the time loop to your favour. Each one has their own primary weapon and ability. Here is our Lemnis Gate guide for Deathblow. Please note that this guide is currently based on the beta build.
Lemnis Gate Deathblow overview
| Ability | Clip size/Cooldown | Details |
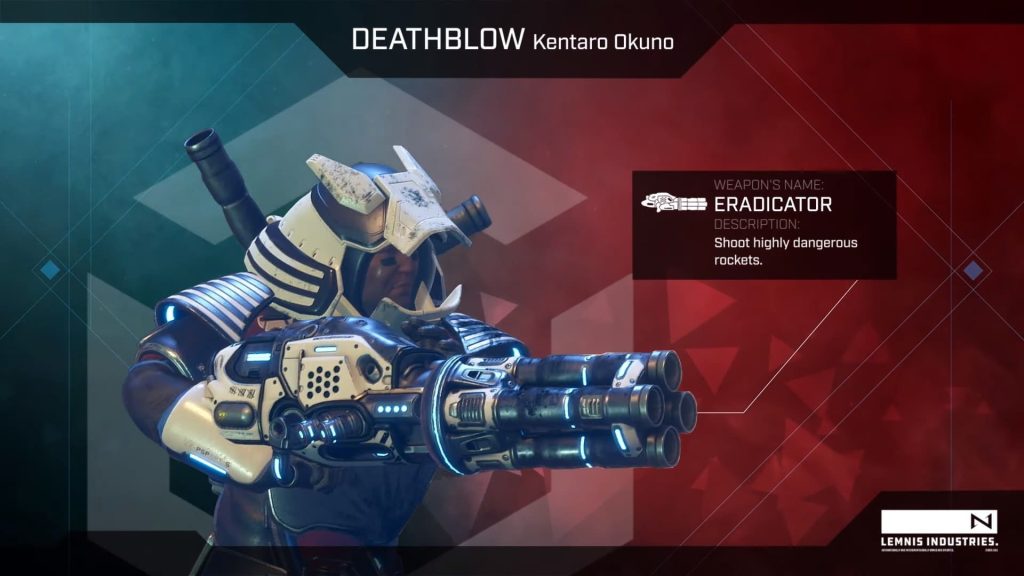
| Primary weapon: Eradicator | 4 clip size | Fires a rocket that deals 100 damage on direct hit with splash damage. |
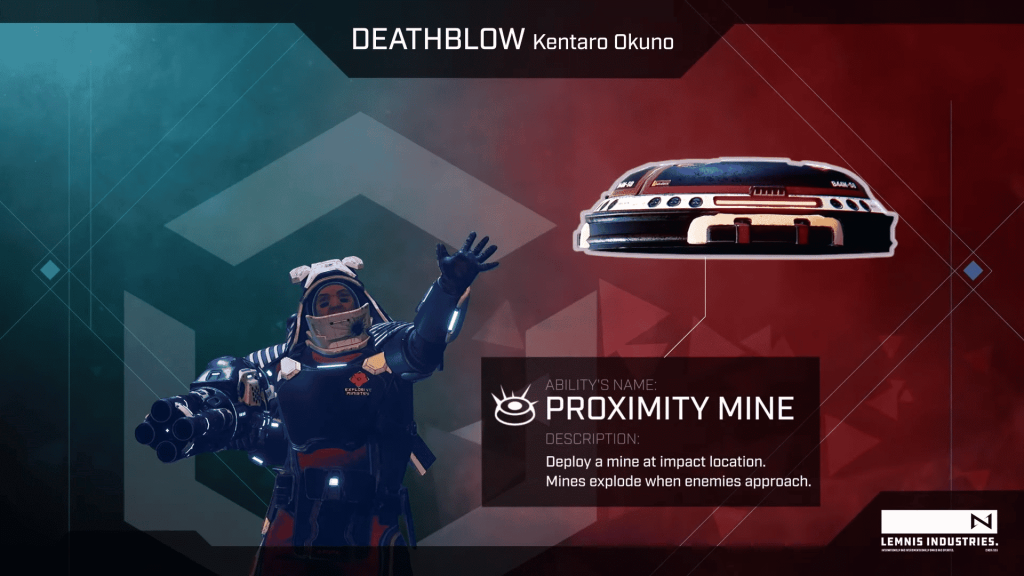
| Ability: Proximity Mine | 5 total, 1.5 second cooldown | Places a mine that detonates when an Operative walks near it. 70+ damage with variance and splash damage. |
Deathblow is a deadly operative with high burst damage and ability to set up mines to eliminate operatives in the time loop. While he has significant damage output, players should be careful that their own operatives do not get caught in the explosions. Deathblow has the highest HP out of all the operatives, sitting at 120 HP.

Usage
Eradicator
Firing Deathblow’s rockets in small corridors or bridges can also deny or discourage players entrance to that area. However, it is generally better to use it to quickly eliminate operatives.
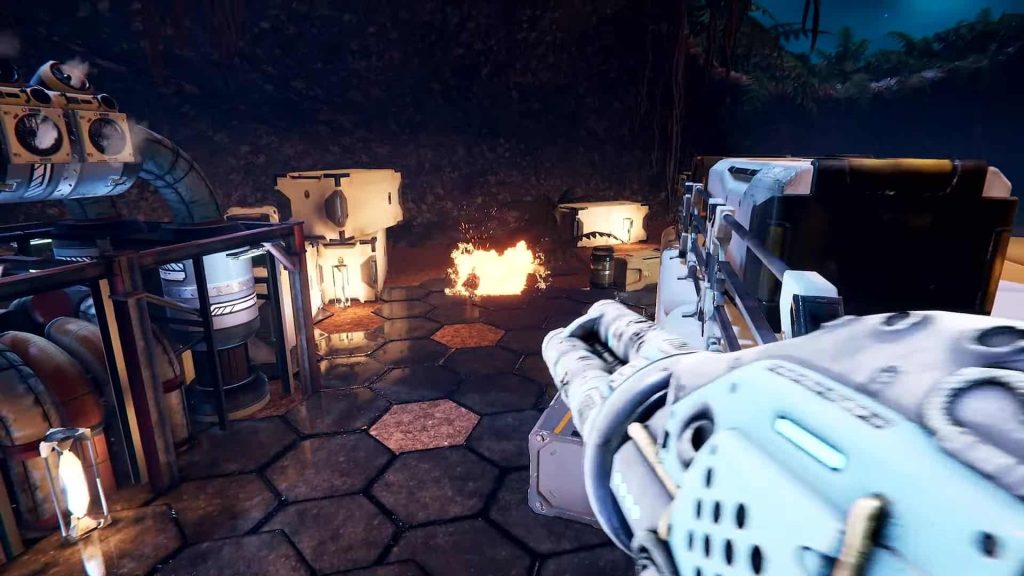
Its high damage output also allows Deathblow to take objectives quickly. However, players need to take care that they do not hit their own operatives. They also need to keep track of when Deathblow fires his rockets and when, else they risk dying to it if they act carelessly in later rounds.
Overall, Deathblow’s strength is in powerful and area-of-effect damage, both useful for eliminating operatives and taking objectives.
Proximity Mines
Deathblow’s ability, Proximity Mine, is excellent at setting up multiple kills in the time loop. By keeping track of where past operatives run past, Deathblow can easily set up mines to prevent an enemy from performing a crucial action or deny areas of the map.
In Retrieve XM, Deathblow can place mines on the objectives that the enemy players take later in the time loop, allowing him to get kills while scoring with the objective on his own.
However, unlike Toxin’s toxic puddles, they can be detonated prematurely by shooting at it. Placement of Deathblow’s mines are easy to determine, but the timing of when to place them is just as crucial.

Relying on Deathblow’s Proximity Mines means he can only use it to eliminate operatives later in the time loop, which also means potential for countering as the enemy can simply destroy it before it has any impact in the time loop.
Dealing with Deathblow
Deathblow can be considered a wildcard, as he can deal massive amounts of damage, but he also has significant potential for friendly fire. Since Deathblow has 120 HP, taking him out quickly in the time loop is more difficult than with any other operatives.
Good KARL shield placements can deny rockets, as they can withstand a direct hit with extra shield to spare. However, they will not protect against mines as effectively.
When dealing with Deathblow, take care to memorize where the rockets and Proximity Mines are being placed. A careless mispositioning can quickly get you killed, resulting in lost time or even turns.
We hope you found this Lemnis Gate Deathblow guide useful. Remember that this guide is currently based on beta data.