Minecraft has evolved into a visually stunning game over the years. The developers have worked hard to make every pixel of their game look as good as possible. Unfortunately, that means that those with low-end PCs cannot play Minecraft smoothly. There’s an easy fix for this problem: simply turn off the clouds in Minecraft.
This guide will show you how to do that using some simple steps.
Turning Off Clouds in Minecraft
Turning off the clouds in Minecraft is as smooth as butter, so you won’t have any trouble finding this option. Make sure to follow each step listed below, and you’ll be able to turn them off in no time:
- Open the Settings menu in Minecraft. You can do so from the main menu or while playing.
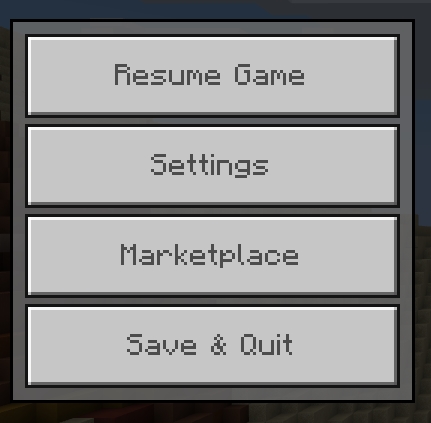
- Select the Video Settings option on the screen’s left side.
- Navigate to the “Render Clouds” and untick it to turn off the clouds completely.

Congratulations, you have completely turned off the clouds in Minecraft, and the sky will now look like this.
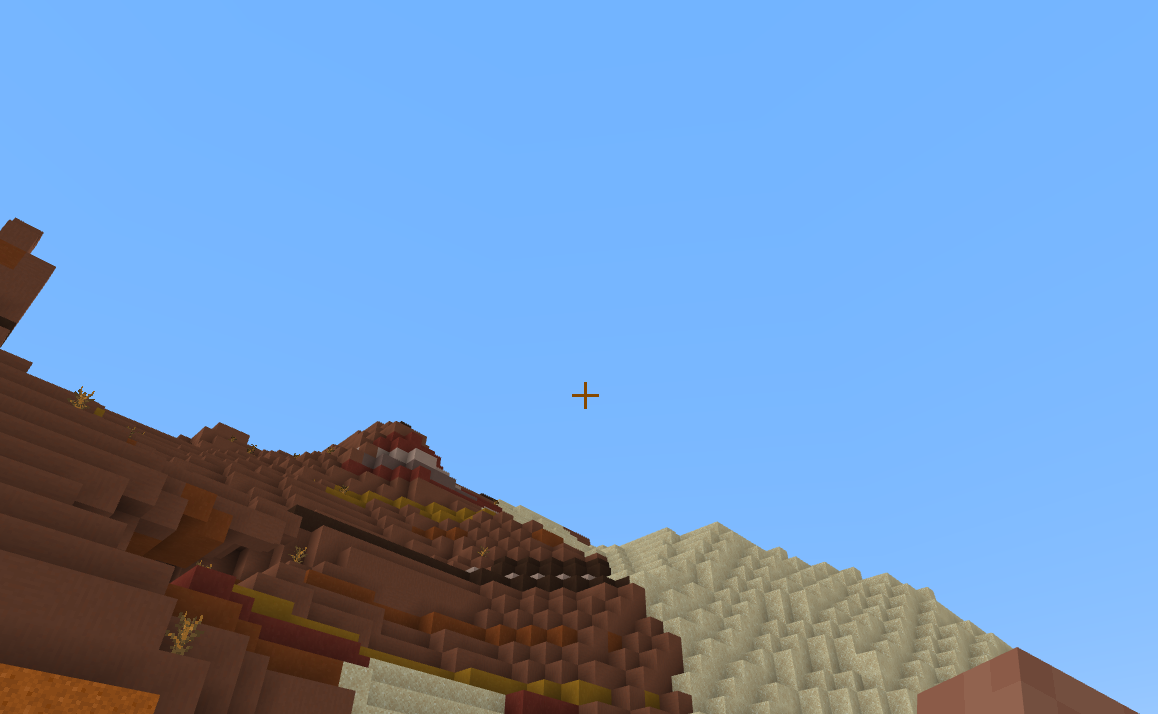
As a result, you’ll have significantly more FPS, and your gameplay will be much smoother, although you won’t be able to enjoy the beautiful and fluffy clouds in Minecraft anymore. If you decide to turn on the clouds once again, repeat the previous steps and tick the “Render Clouds” option once again.
How Will This Impact FPS in the Game?
Absolutely! If your PC is struggling with Minecraft, especially when you’re out in the open where there are so many details, this is the best thing you can do to make the game smoother and increase the FPS. Disabling the clouds in Minecraft will increase your FPS immediately, although there are other options you can disable in the settings. In addition, you can try out allocating more RAM memory to Minecraft.